Monday, 9 March 2015

I've made you the moon.

I've made you the moon,
so when you're in bed at night
you can think of it shining 
as you shut your eye's tight.
Well here’s hoping!


I think Hector thinks the Moon and has something to do with cows, as sometimes when looking at picture of one he’ll point to the sky and say ‘Mooooooo’.


As I was trying to explain to him the difference one morning I had the idea to knit him his own little moon.
I’d just been given some great chunky yarn from his Nana Marie and it’s so dense and well, in my eyes moon looking; having been unraveled and wound into a big ball.

I hadn't intended it to be a pattern I might share, but if you would like to make your own little moon here it is. It’s a pretty quick knit to make the structure, It just depends how many craters you add, they can be a little tricky if you're not used to picking up stitches. But each one is over so soon that it feels achievable.

The Moon


A few notes on the pattern.
I've used a chunky Rowan cotton yarn but knitted it up on 4.5mm needles to make it a really solid construction. For the craters I split the yarn in 2, but you can always use a similar colour in a finer ply.

The Yarn I used is Rowan, 'All Seasons' which is now unfortunately discontinued, but the tension is: 7mm needles (as the wool band states), 11st/ 16rows for a 10cm/ 4inch square.  On 4.5mm needles it's: 18st/ 22rows.

You will need:
Chunky wool (any chunky stash yarn will do as long as it's moony) 
4.5mm needles
set of 5, 2.5mm dpns
Toy stuffing
wool needle for sewing up.

The moon

Cast on 6 stitches.

Row 1- Kfb all stitches
Row 2 - Purl all stitches 
Row 3- Kfb all stitches
Row 4 - Purl all stitches 
Row 5 - *K1fb K1* to end of row
Row 6 - Purl all stitches 
Row 7 - *K1fb K2* to end of row
Row 8 - Purl all stitches 
Row 9 - *K1fb K3* to end of row
Row 10 - Purl all stitches 
Row 11 - *K1fb K3* to end of row (total of 60 stitches)
Row12- Purl all stitches 
Row13- Knit all stitches 
Repeat rows  both 12 and 13 a further 6 times 

Row 25- *K2tog knit 4* to end of row
Row 26- Purl all stitches 
Row 27- *K2tog knit 3* to end of row
Row 28- Purl all stitches 
Row 29- *K2tog knit 2* to end of row
Row 30- Purl all stitches
Row 21- *K2tog knit 1* to end of row
Row 32- Purl all stitches
Row 33- K2tog to end of row
Row 34- Purl all stitches
Row 35- K2tog to end of row

Cut yarn leaving a long tail and thread trough the remaining 6 stitches on the needle. Remove from the needle, pull tight and tie off.

seam up to about an inch before your cast on stitches then fill with lots toy stuffing, then continue sewing up till you have a solid moon. 
 I used mattress stitch to seam up, you can find loads of great tutorials on youtube if you haven't done this before.

Craters

Notes on pick up stitches for the craters:

Each stitch you have made for your moon forms a little V shape, for these craters I pick up one half of the V, I'll call them legs.


Step 1 
With a darning needle thread your yarn threw the leg of a V and tie (leaving a 5cm tail to tidy away when finished).


Step 2
Go to the next Leg of a V to the left and insert 1 of your dpns, this is will be your first stitch. knit this stitch through the back.


Step 3
Again go to the next leg on the left of your first stitch and knit this through the back to create your second stitch.


Step 4
 You want the craters to be as circular as you can so imagine a square or diamond shape when picking up these stitches.
I picked up between 3 - 7 stitches per needle depending on the size of the crater.


Step 5
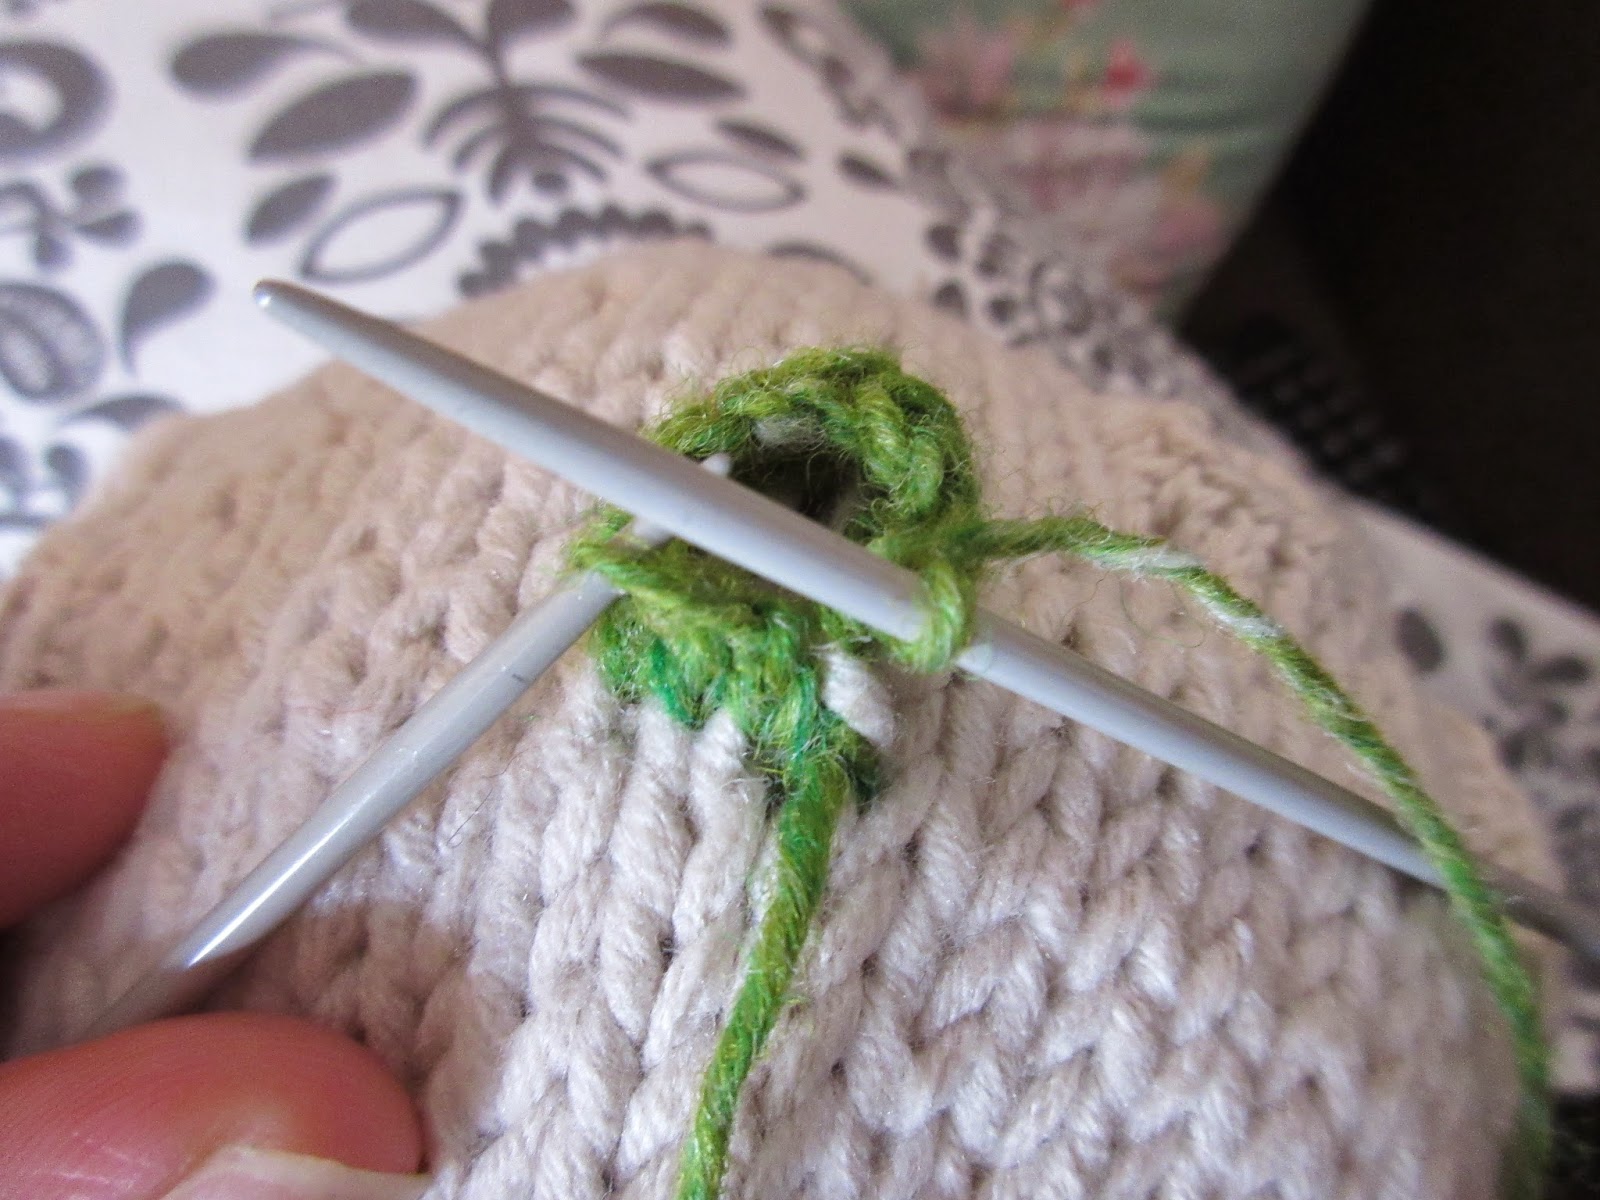
When you have all your stitches on their needles you can decide either to, knit 1 round and then cast off all the stitches or simply cast off all the stitches made; depending on how deep you want the crater. I did a mixture.


Its a good idea when you have finished casting off, to pick up the first stitch you cast off and use this to cast off the last stitch in your round, it make it look neater (see the image above).

 When you have made all the craters with a wool needle sew in all the ends to hide them.

I kept the little green one.

Add a length of yarn to hang the moon.


Here are some other pics of a larger crater I made in a diamond form.


I hope you have fun making your moon I certainly did.


Monday, 9 February 2015

It’s all a lesson in reading your pattern.


 A new year and new knitting projects in the bag. I'm so excited to be knitting though the seasons again and I’m already thinking ahead to spring. Luckily it’s still a while off because my spring shrug currently looks like this…


But I’m not dishearten (much), I have put too many hours into figuring out how to increase the lace pattern too give up yet. It’s all a lesson in reading your pattern before charging ahead. I was on such a roll! Too much, I should have stopped 20 rows earlier.

Oh well to make myself feel better I thought I’d share with you the projects this winter that I was really please with.

If you happened to read my first blog you may remember I started my Mum a jumper some time in the summer of 2012, well… I finished it. A very satisfying feeling to finally sit down and get it finished.

 It’s great to go into the new year with no project bags half finished and making me feel guilty. The pattern is, Drops- Rings of saturn, I added a little Dandelion for my Mum as she makes a range of cups with them on and they are really pretty. 

you can see more at 'hints and tips for the potter'


On a Drops theme, I adapted this little scarf pattern for hector. I thought I’d make it a Fox as he loves chasing the geese and pigeons in the park and I had a small amount of this great foxy coloured wool that needed using. I love using up all the odd ends I have stashed. It a great weekend project, luckily as it started we got snow the week after. 


The pattern is excitingly called Drops- B14-16 Hat, scarf and mittens It's quite an old fashioned looking set but Drops on a whole have some great basic patterns to get creative with.

And I have to share these softies that I knitted for presents this christmas. I was really pleased with how they turned out. They are from this great book I got for my birthday Called Topsy-turvy Inside-out by Susan B. Anderson. 


Back to my spring shrug now, Happy Knitting!


Wednesday, 16 July 2014

I've been gathering.

Like most knitters I have a compulsion to buy wool; Sometimes just one ball that won't be good for anything, sometimes on mass for a major works that I'll dream about but will never materialise  I can honestly say it is the only thing in my life that is organised, that and my button collection, (If I could only colour coordinate my tax returns).

Anyway for some reason or other, possibly the birth of Hector I haven't been adding to my stash, I have simply been using it, it feels very resourceful. I've been knitting some very stripy dungarees for the little man, which I'm sure he will LOVE ( a photo to follow, with him wearing them of course).


However I have been adding to my knitting collection with other things, such as this very sweet french knitting lady that I picked up in a antique/ junk shop, she reminds me of a piece of folk art.


I know the embroidery hoop isn't really knitting but, 1- it was only a pound, and 2- I have had great plans for these and my knitting for long time, and now one day they will be realised and I'll be ready!

Also my mom nearly threw this book out. As you can see it is aptly titled 'Wild Knitting'. I've picked out a few of my favourites. There are some less wild things in the book that I hope to knit, such as a Toucan hat and some duck feet socks.


I very excitingly received the wonderful and extremely inspiring Kate Davis book, 'Colours of Shetland'. I cannot wait to get going on some of these for winter. if you are not familiar with her knitting and writing check out her blog http://katedaviesdesigns.com


And last but by no means least, I got a spinning wheel for my birthday!! It's great. I can't get my body and mind to get all of it working at the same time yet but I'm going for a lesson in September. Apparently it's meant to be very mediative once it's going, thank god as so far I just have cramp in my foot.


Happy Knitting!


Thursday, 1 May 2014

Garter Stitch Purse Pattern

I have a new beginners knitting class starting at the sewing school tomorrow night and I wanted something new to teach. I've come up with this really simple and very cute Garter stitch purse. It's great if you are new to knitting or you want a quick stash busting project. It's big enough to hold a credit card but I can't promise that your change won't fall out.
I'd Love to see how you are all getting on with this project as it's getting a lot of hits from Knitting galore. So please put a picture up on my Ravelery page. 


What you will need:

4mm needles
wool
A wool needle
1 button


Lets get started! 

cast on 23 stitches

Knit 9 rows 

Making the button hole:

Row 10 - K9, cast off 5st, Knit to the end of the row

Row 11 - K9, turn work and cast on 5st, turn back round to join the 2 sides and continue to knit to the end of the row.


Knit  8 rows

Row 20 - Purl all stitches

                                  
This what the inside looks like with that 1 purled row. You get a section of STst, I find helps it fold.


This is the right side. You can see a slight difference in the stitches where the purl row is.

Knit 17 rows


Row 38 - K1, K2tog, knit to final 3st, K2tog, K1
Row 39- Knit all stitches
Repeat rows 38 / 39, a further 4 times

Row 48- K1, K1fb, Knit to last 2 st, K1fb, K1
Row 49 - Knit all stitches

Repeat rows 48 / 49 a further 4 times.

The finished piece before seaming up.
Knit 16 rows

cast off all stitches. (see below pattern for cast off details)

All that is left to do is to seam up the edges and sew in the loose ends.


Casting off. 

I recently found this great method of casting off on Youtube. It's really stretchy and really quick. 
Here the link: 'My favourite stretchy bind off by Paula Fuessle'.

If you do have a go I'd love to see it, so put it on the Ravelry page.

Happy Knitting!

Monday, 14 April 2014

Knitting’s not just for Christmas


You may think of knitting as a winter hobby, cozying up, madly knitting scarves and socks for Christmas presents. But there are endless projects for the spring and summer months.

I’ve decided to up-cycle some of my clothes for summer.  I wanted quick projects that I would actually get finished in time for summer. It’s rather addictive, and I’ll have to make sure I don’t take the scissors to too much of my wardrobe.

I started small with this old vest top.


Since I started knitting I have always wanted to knit lace, and indeed I did knit my mum a lace blanket one Christmas. (It’s one of those projects I wonder how I ever got done.) There are some amazing lace patterns and I just loved this one, called Mountain Peaks. I found it on the wonderful and aptly named http://laceknittingstitch.blogspot.co.uk/2011/07/mountain-peaks.html I used a cotton yarn so I would be able to wash it like I would normally. It also looks better, I think.


I cut the hole in the top after I knitted the swatch.

Thrilled with the success of this piece, I got a little braver with my scissors and cut up an old T-shirt of my brother’s.


There is a great blog called http://www.craftstylish.com where she gives you a tutorial of how to crochet an edge. However, I can’t crochet so I knitted the edge using a Moss stitch as it doesn’t curl and is easily one of my favourite stitches. I also thought that the little bobbles of the stitch matched the spots on the T-shirt.


If you haven’t tried Moss stitch before it goes like this:

Cast on an even number of stitches

Row 1 - *Knit1, Purl1 * Rep these 2 stitches to the end of the row
Row 2 - *Purl1, Knit1 * Rep these 2 stitches to the end of the row

Repeat both rows.


I’ve also been busy coming up with an Easter pattern to sell as a pack at the sewing school. I came up with this super cute chick, which knits up in a couple of hours.


What a great season to be knitting!