I've made you the
moon,
so when you're in bed
at night
you can think of
it shining
as you shut your
eye's tight.
Well here’s hoping!

I think Hector thinks
the Moon and has something to do with cows, as sometimes when looking at
picture of one he’ll point to the sky and say ‘Mooooooo’.

I’d just been given
some great chunky yarn from his Nana Marie and it’s so dense and well, in my
eyes moon looking; having been unraveled and wound into a big ball.
I hadn't intended it to be a pattern I might share, but if you would like to make your own little moon here it is. It’s a pretty quick
knit to make the structure, It just depends how many craters you add, they
can be a little tricky if you're not used to picking up stitches. But each one is
over so soon that it feels achievable.
The Moon

A few notes on the pattern.
I've used a chunky Rowan cotton yarn but knitted it up on 4.5mm needles to make it a really solid construction. For the craters I split the yarn in 2, but you can always use a similar colour in a finer ply.
The Yarn I used is Rowan, 'All Seasons' which is now unfortunately discontinued, but the tension is: 7mm needles (as the wool band states), 11st/ 16rows for a 10cm/ 4inch square. On 4.5mm needles it's: 18st/ 22rows.
The Yarn I used is Rowan, 'All Seasons' which is now unfortunately discontinued, but the tension is: 7mm needles (as the wool band states), 11st/ 16rows for a 10cm/ 4inch square. On 4.5mm needles it's: 18st/ 22rows.
You will need:
Chunky wool (any chunky stash yarn will do as long as it's moony)
4.5mm needles
set of 5, 2.5mm dpns
Toy stuffing
wool needle for sewing up.
The moon
Row 1- Kfb all stitches
Row 2 - Purl all stitches
Row 3- Kfb all stitches
Row 4 - Purl all stitches
Row 5 - *K1fb K1* to end of row
Row 6 - Purl all stitches
Row 7 - *K1fb K2* to end of row
Row 8 - Purl all stitches
Row 9 - *K1fb K3* to end of row
Row 10 - Purl all stitches
Row 11 - *K1fb K3* to end of row (total of 60 stitches)
Row12- Purl all stitches
Row13- Knit all stitches
Repeat rows both 12 and 13 a further 6 times
Row 25- *K2tog knit 4* to end of row
Row 26- Purl all stitches
Row 27- *K2tog knit 3* to end of row
Row 28- Purl all stitches
Row 29- *K2tog knit 2* to end of row
Row 30- Purl all stitches
Row 21- *K2tog knit 1* to end of row
Row 32- Purl all stitches
Row 33- K2tog to end of row
Row 34- Purl all stitches
Row 35- K2tog to end of row
Cut yarn leaving a long tail and thread trough the remaining 6 stitches on the needle. Remove from the needle, pull tight and tie off.
seam up to about an inch before your cast on stitches then fill with lots toy stuffing, then continue sewing up till you have a solid moon.
I used mattress stitch to seam up, you can find loads of great tutorials on youtube if you haven't done this before.
Craters
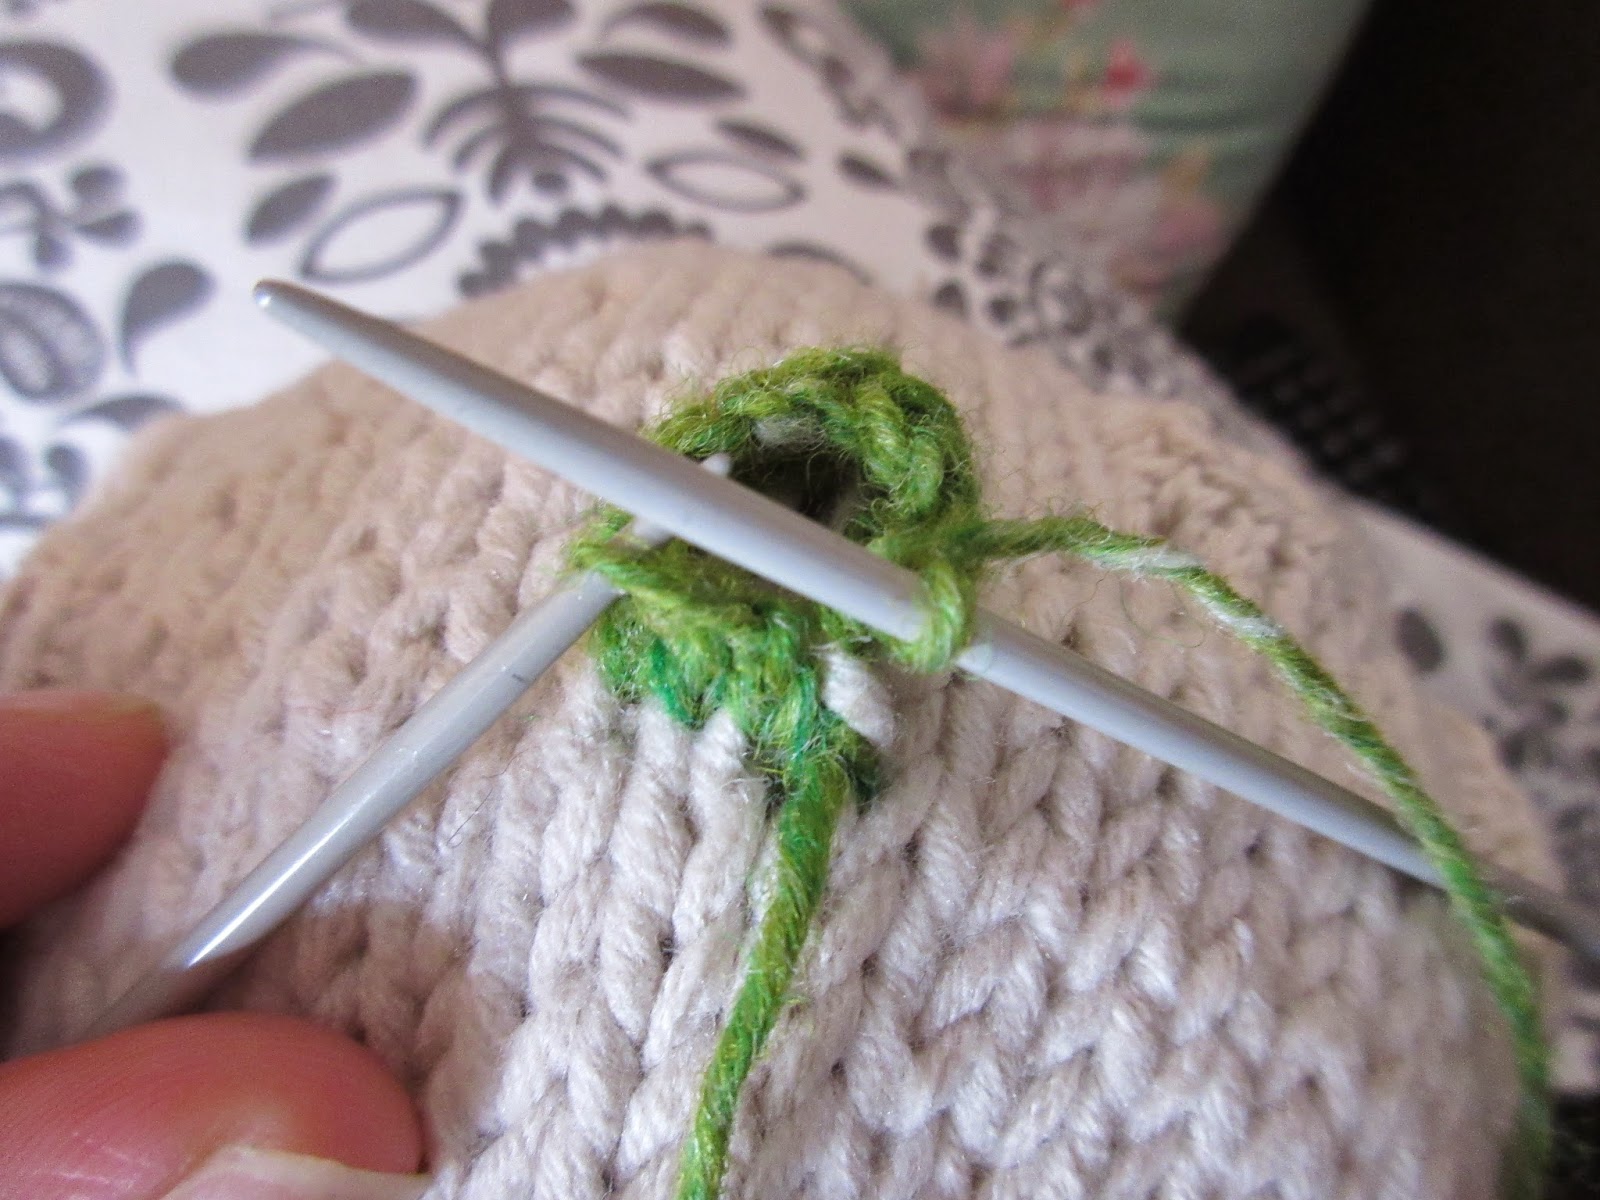
Notes on pick up stitches for the craters:
Each stitch you have made for your moon forms a little V shape, for these craters I pick up one half of the V, I'll call them legs.

With a darning needle thread your yarn threw the leg of a V and tie (leaving a 5cm tail to tidy away when finished).

Step 2
Go to the next Leg of a V to the left and insert 1 of your dpns, this is will be your first stitch. knit this stitch through the back.

Step 3
Again go to the next leg on the left of your first stitch and knit this through the back to create your second stitch.
Step 4
You want the craters to be as circular as you can so imagine a square or diamond shape when picking up these stitches.
I picked up between 3 - 7 stitches per needle depending on the size of the crater.


Step 5
When you have made all the craters with a wool needle sew in all the ends to hide them.

 |
| I kept the little green one. |
Add a length of yarn to hang the moon.
Here are some other pics of a larger crater I made in a diamond form.


I hope you have fun making your moon I certainly did.
I'd be over the moon if I made one of these!
ReplyDeleteLove it ! What a great idea.
ReplyDeleteAnd I finally know what I’m knitting for my youngest nephew. I may need to make a Mars with some stash red/brown to be the moons friend!
ReplyDeleteI'm thinking of making this using glow-in-the-dark yarn. That'll be fun 😁
ReplyDelete